What we will be building
Below is the screenshot of the app we will be building today.
Bootstrapping React Native Application
I will be using expo cli in this tutorial, everything should work fine for anyone using react native cli. Let's create the app by running the command as seen in the screenshot below, choose the blank (Typescript) template since we will be using typescript.
Installing dependencies
We need to install all the dependencies needed for this app - Tailwind CSS and Heroicons
cd react-native-auth-flow
yarn add tailwindcss-react-native react-native-heroicons react-native-svg
yarn add --dev tailwindcss
Setup React NativeTailwind CSS
Step 1:
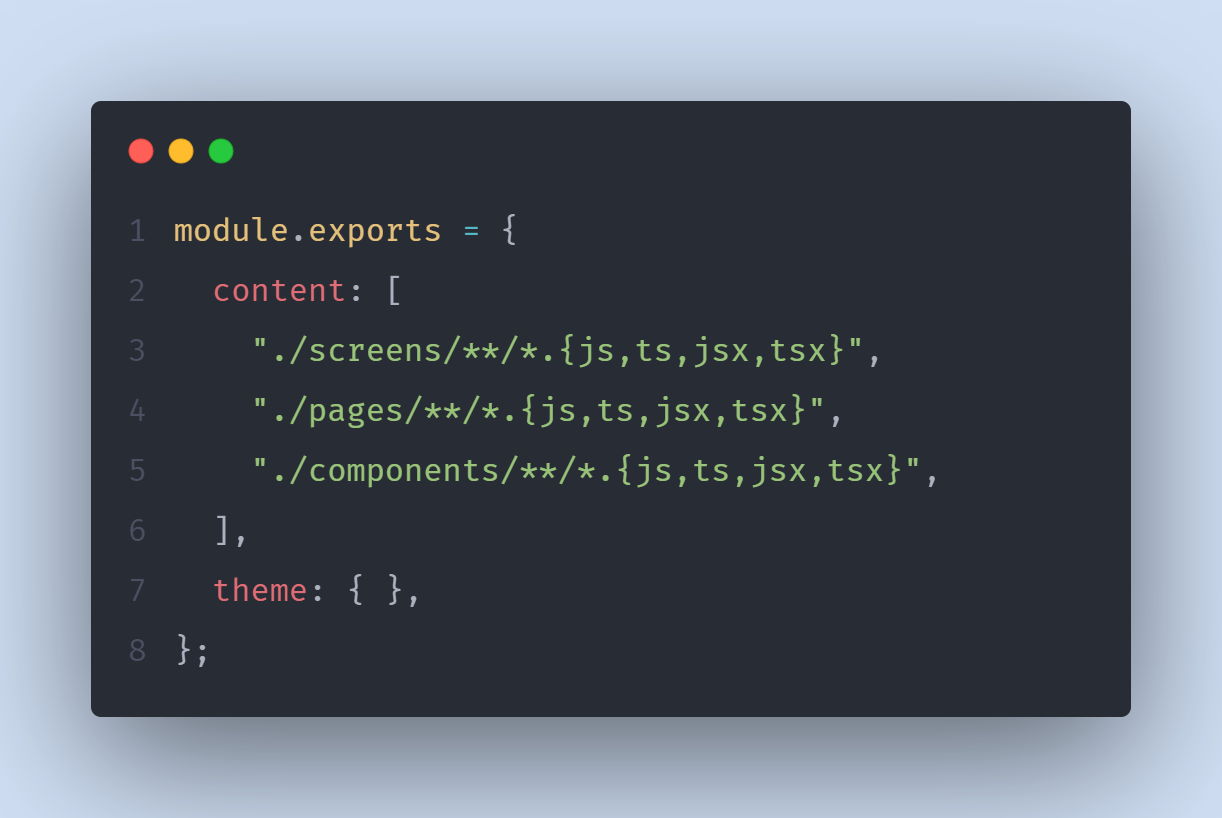
Create tailwind.config.js file in the root of your project and modify the content like so:
Step 2:
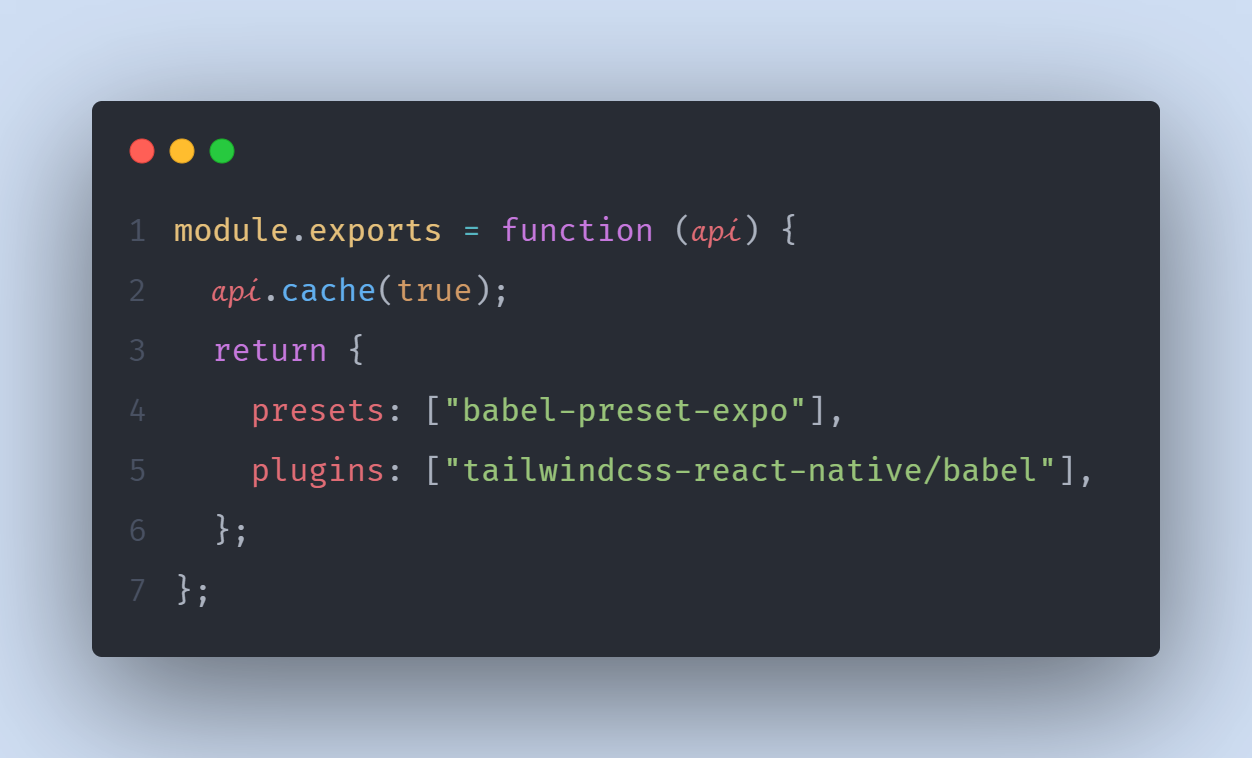
Add React Native Tailwind CSS Babel plugin
Step 3:
Create tailwindcss-react-native.d.ts in the root of your project and add this single import. If you are using typescript and you don't add this you won't be able to use classname within your app.
import "tailwindcss-react-native/types.d";
Step 4
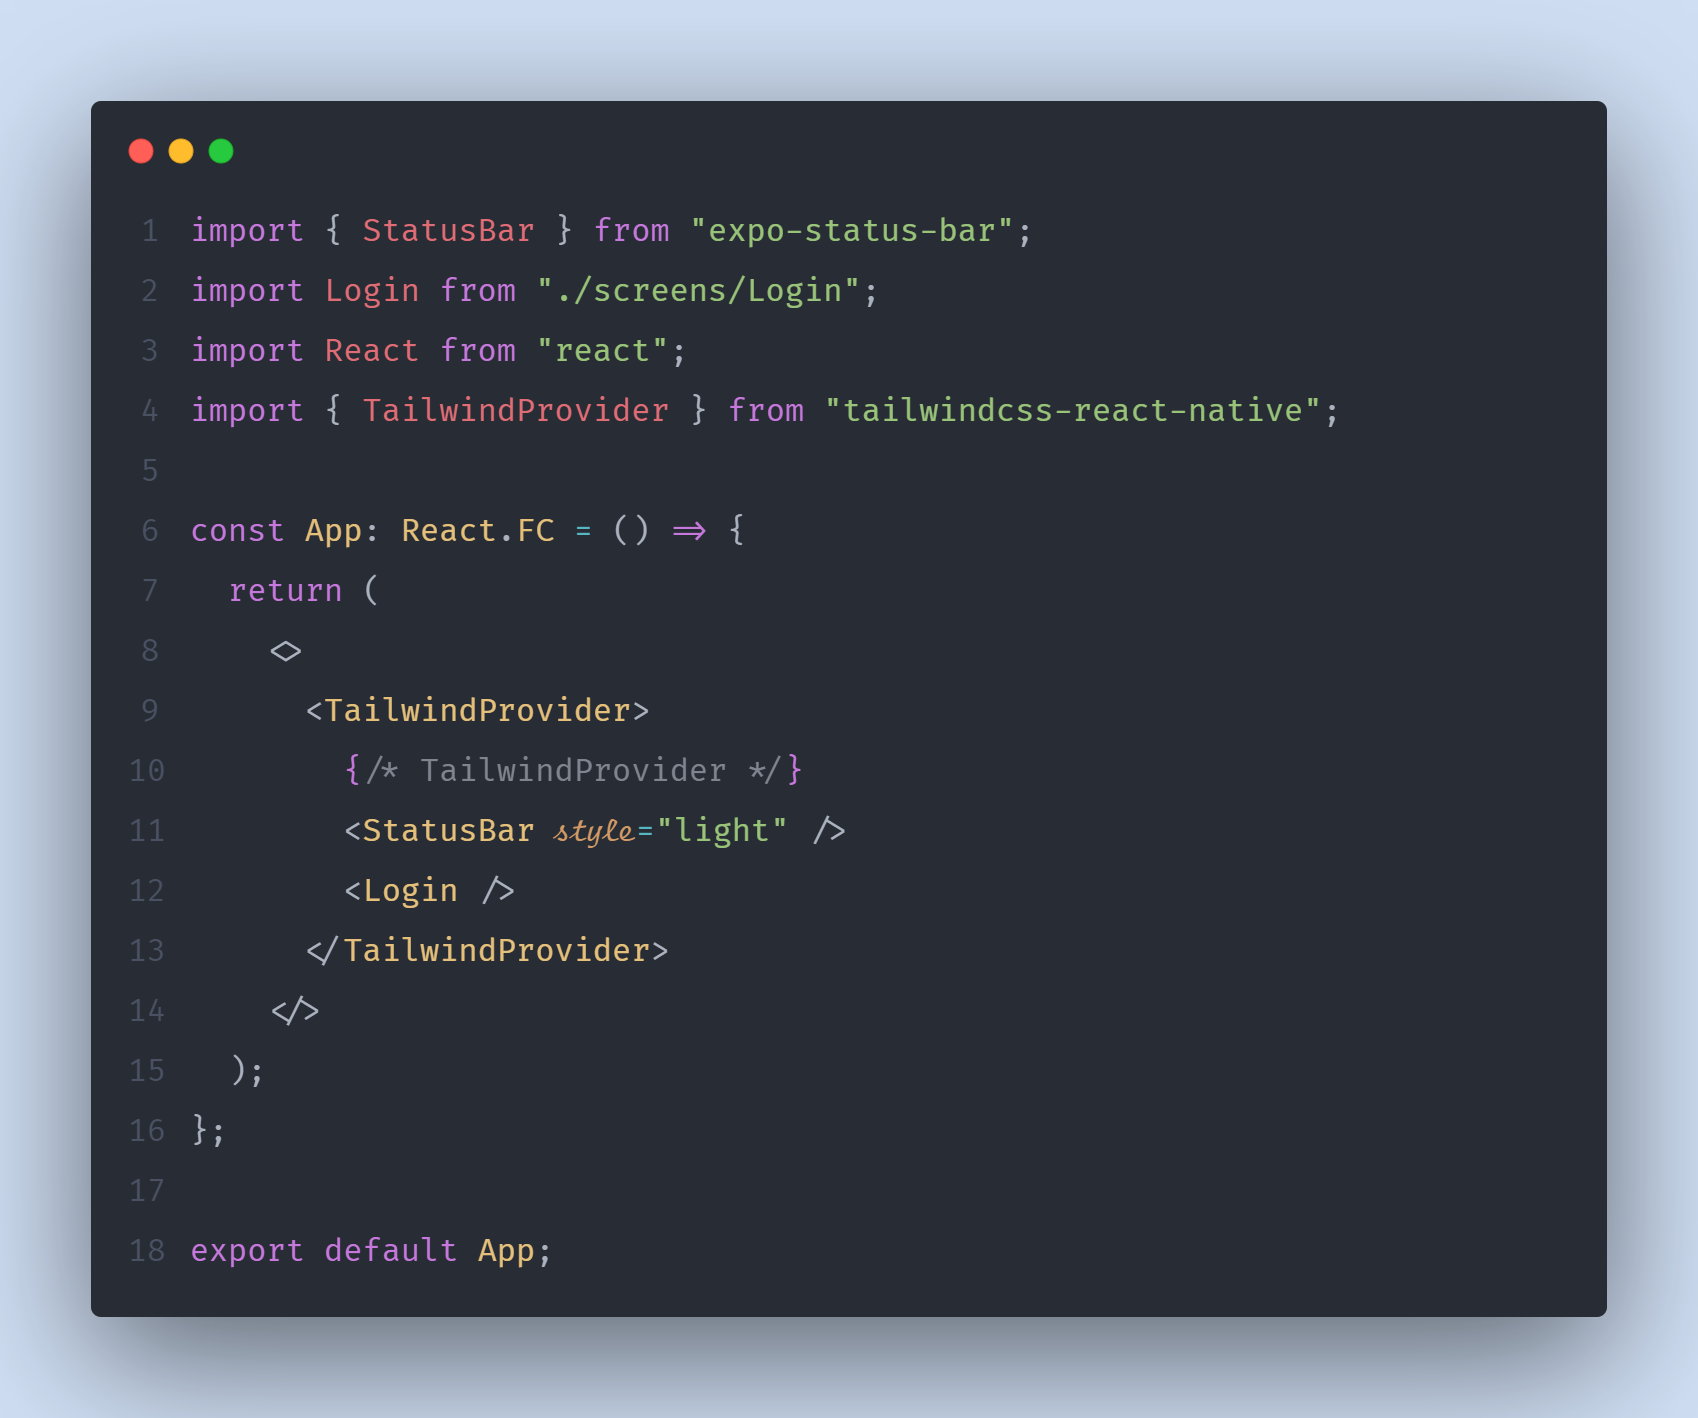
This is the last step. We need to wrap our entire app with tailwind provider. Modify your App.js to add the TailwindProvider:
Creating the Screens
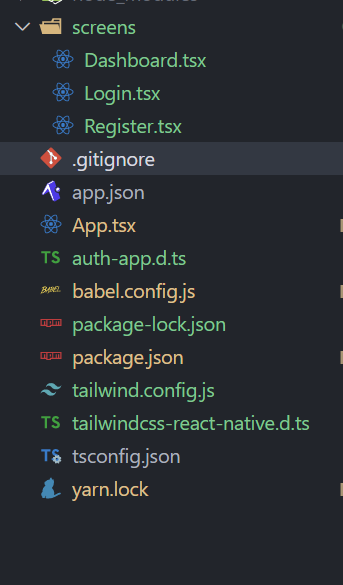
Create a folder named screens at the root of the project and create the three screens namely Login, Register, and Dashboard.
The project should look like this:
Custom Components
To start the development of the screens, we need to create some reusable custom components. Create a folder named Components.
Creating the container component
The first component will be the container component, this will be the app wrapper container. In the project's components folder, create a file named MainContainer.tsx and modify.
Creating Custom KeyboardAvoiding Component
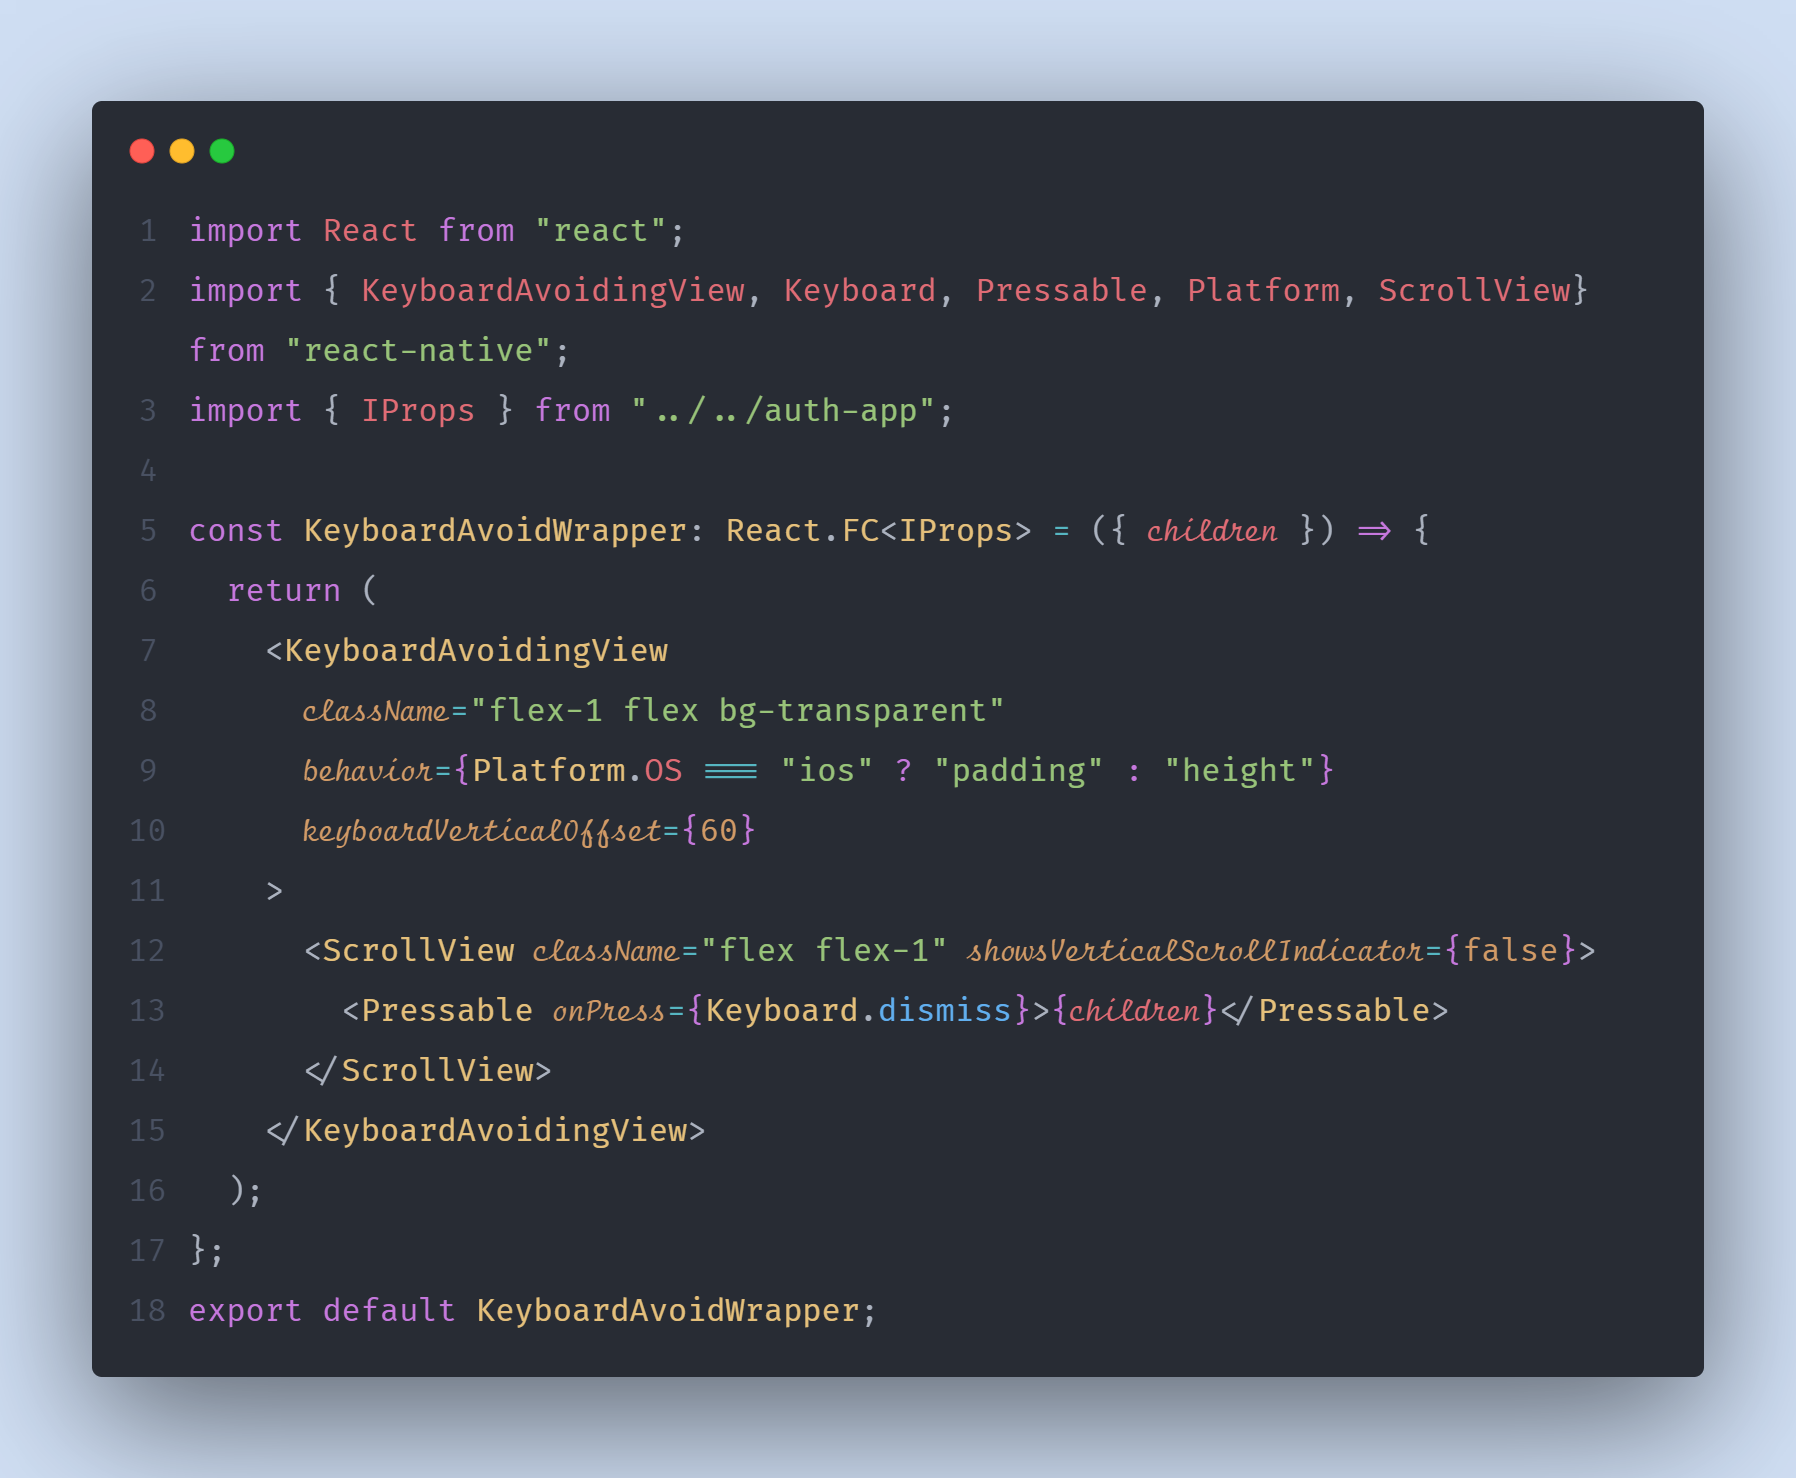
Within the Container folder, create a file named KeyboardAvoidWrapper.tsx like so:
Creating Custom TextInput
Create a folder named InputText within the component's folder, and then create a file and name it CustomTextInput.tsx. Modify the content like this:
Notice that in line 3 of the code, we are using InputProps. This is the typescript interface for the custom input props. Let's create the file right now. At the project's root, create a file named auth-app.d.ts and add the code below.
The CustomButtonProps will be used later by our custom button component.
Creating Custom Button Component
Create a folder within the components folder named Buttons and create a file named CustomButton.tsx
Creating the DashBoardCard Component
Add a file named Components/Card/DashBoardCard.tsx like so:
The Login Screen
Open up the Login file and modify the content like so:
The Register Screen
The Dashboard Screen
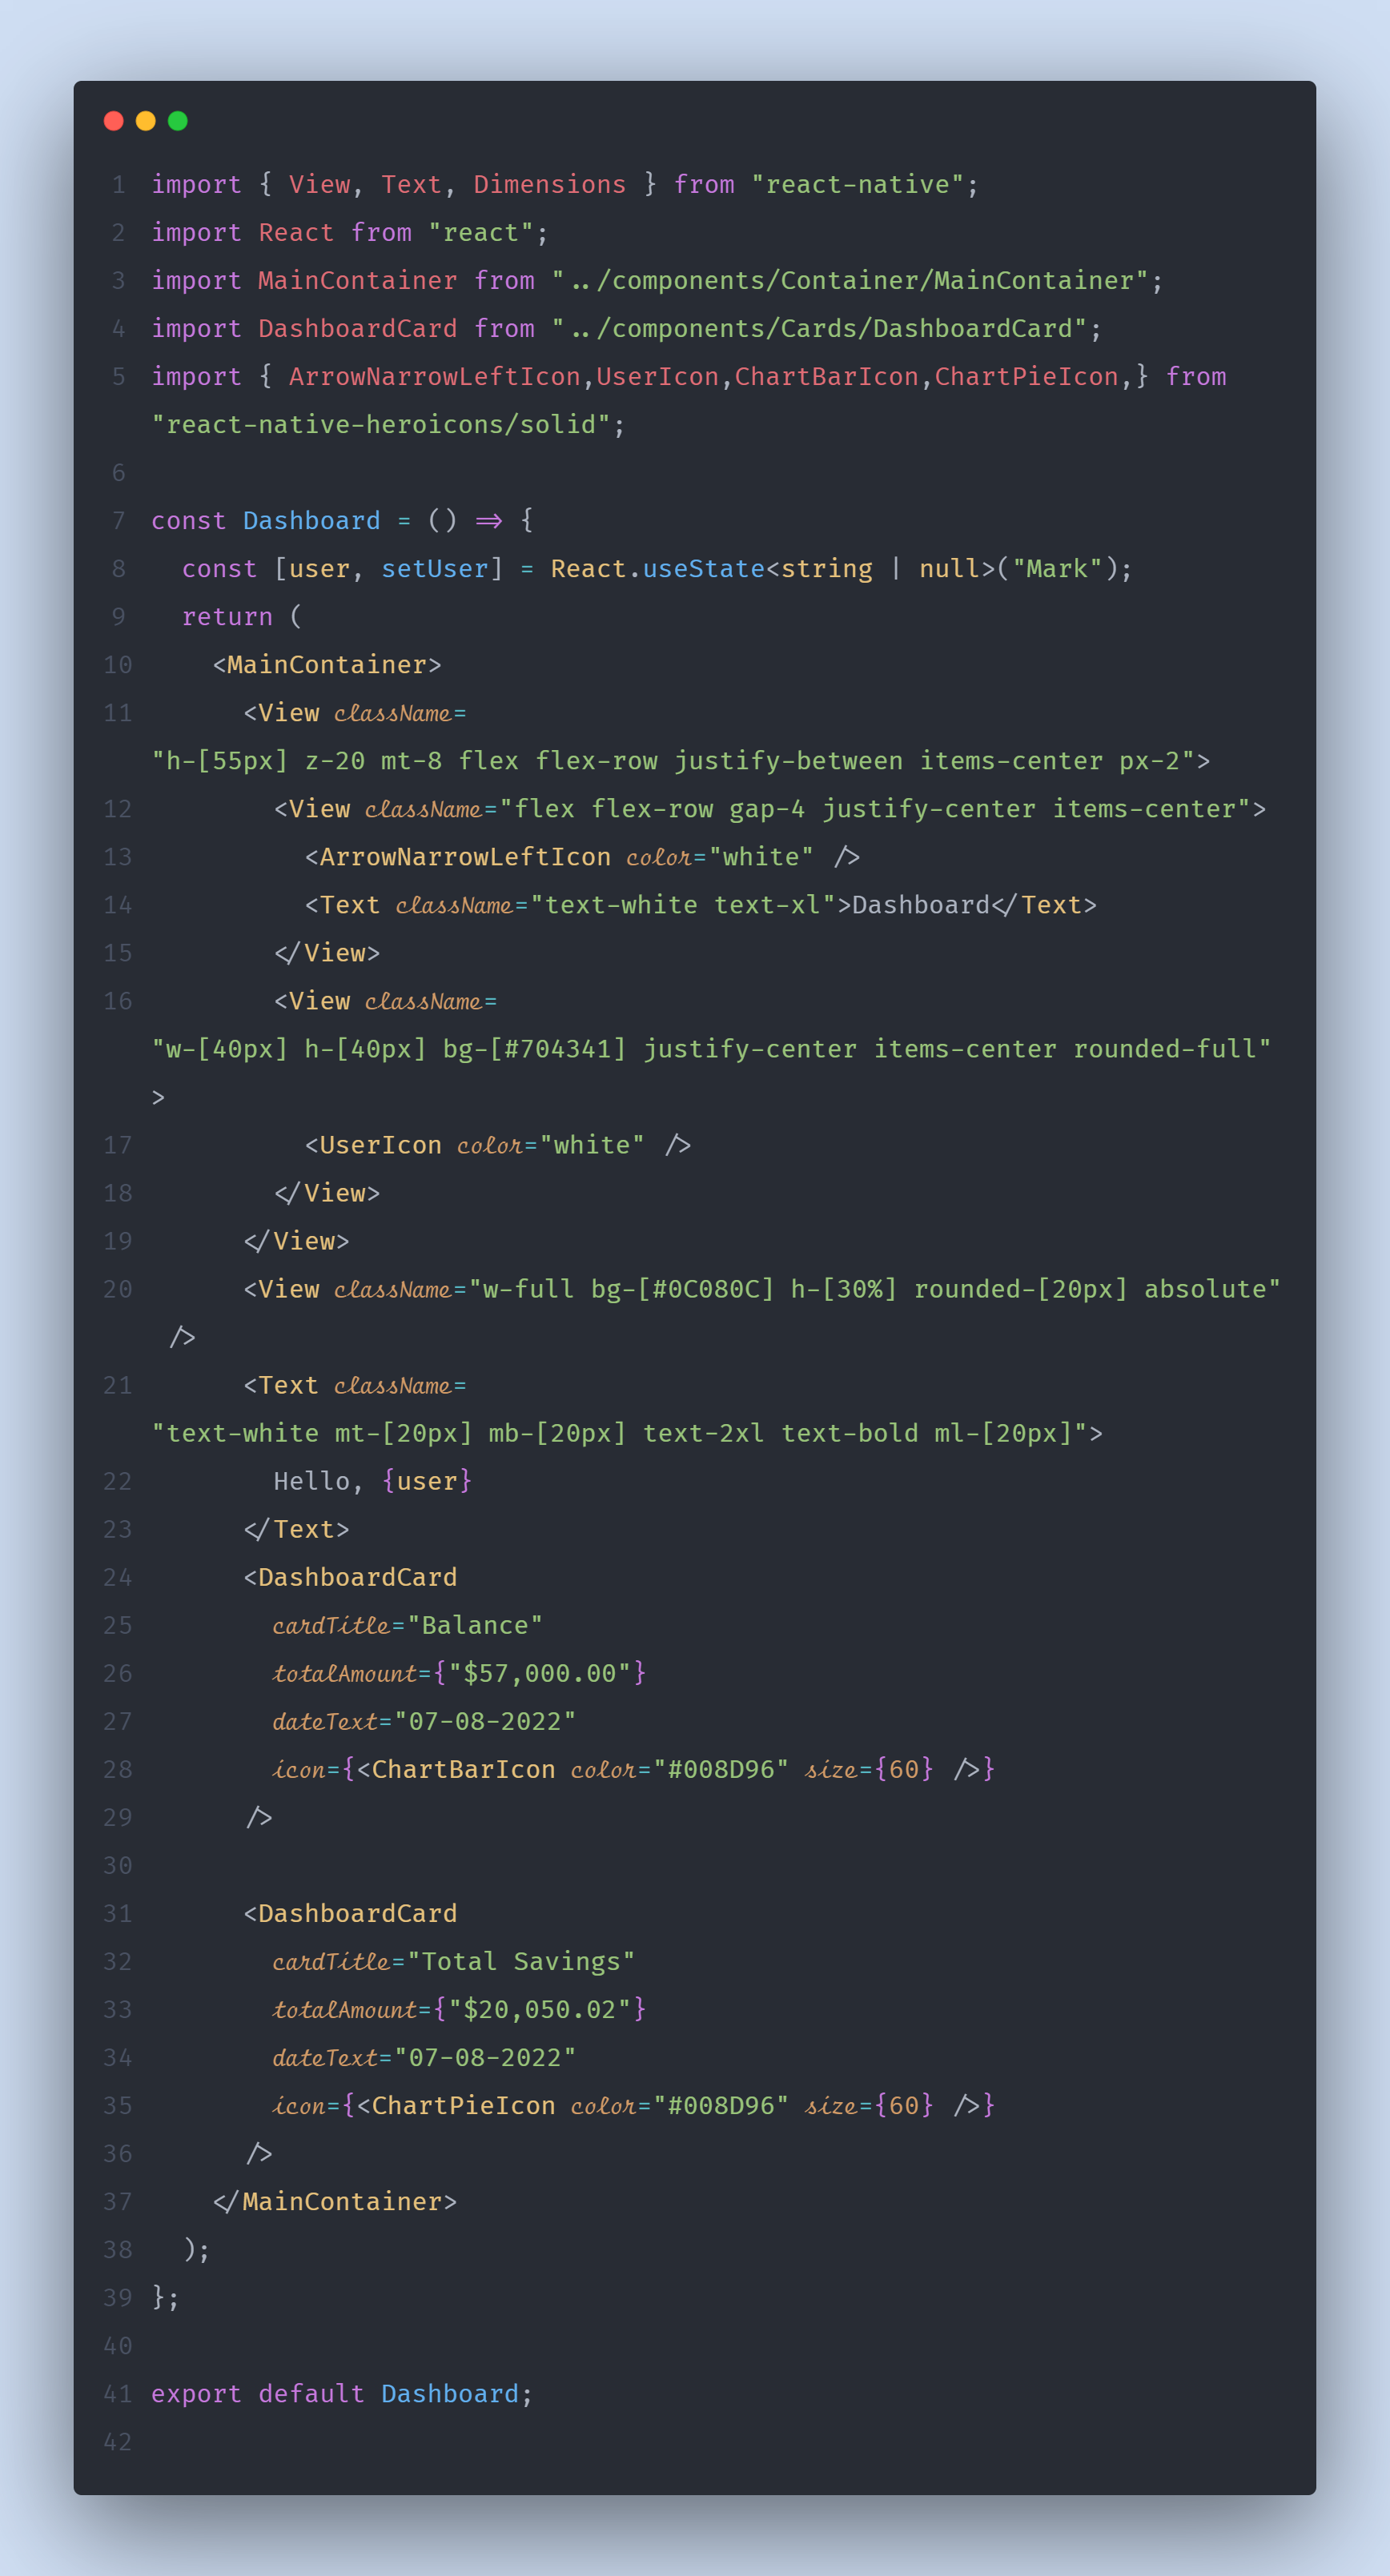
This is the last screen left. Modify the Dashboard file like so:
That is it! You can find the complete source code in my Github repo.
Happy coding.





Post a Comment
0Comments